How To Install A Float Valve In A Water Tank
Do you want to ensure that your water tank is always at the optimal level? Installing a float valve in your water tank is an easy and effective way to do so. It also known as a float switch or ballcock, is a device used to regulate the flow of liquid from one place to another. By installing this device in your water tank, it will help maintain the desired levels of liquid within the container. We’ll discuss what benefits come with using a float valve, how you can install one yourself in just four simple steps and tips for maintenance. So if you’re looking for an efficient way to keep your water tank full – read on!
Overview of a Float Valve
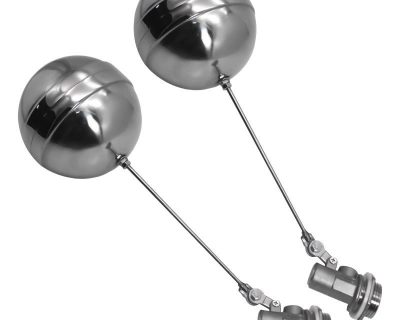
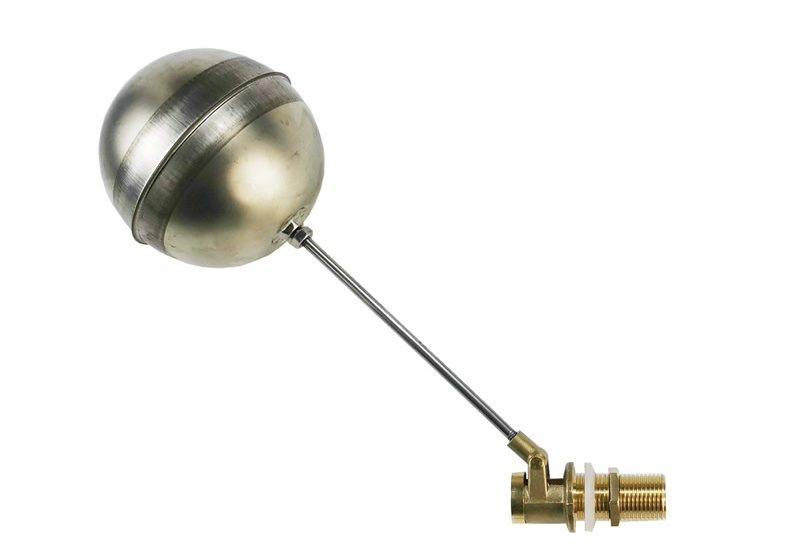
A float valve, also known as a float switch or ballcock, is an essential device for regulating the flow of liquid from one place to another. It works by using buoyancy and gravity to control the level of water in a tank or other container. It consists of two main parts: a floating arm with an attached valve stem and a fixed seat that the stem fits into when it is lowered. When the water level rises above its set point, the float raises up on its hinge until it reaches its maximum height and triggers the valve to close off any further inflow. This prevents overfilling of your tank while still allowing you to maintain optimal levels at all times.
Benefits of Installing a Float Valve in Your Water Tank
Installing it in your water tank will save you time and money. It eliminates the need for regular manual topping up, and it ensures that the water level remains reliably consistent throughout all seasons. The device also prevents overfilling which can lead to costly flooding or damage to the tank structure. They are also relatively low maintenance – they don’t require electricity to function and can be used in both indoor and outdoor tanks.
Steps to Install a Float Valve in Your Water Tank
Installing it in your water tank is an easy and effective way to ensure that the optimal level of liquid stays inside. They are relatively low maintenance, don’t require electricity to function, and can be used in both indoor and outdoor tanks. In this article, we’ll discuss how you can install one yourself in just four simple steps.
– Step 1 – Prepare the Area and Gather Tools
Before you begin installing a float valve in your water tank, it is important to prepare the area and gather all necessary tools. First, turn off any power sources connected to the tank before beginning installation. Then gather together all the materials and tools that you will need for installation such as a wrench, screwdriver, drill bit set, and sealant. You may also want to have some towels or rags nearby in case of any spills during installation. Once everything is ready, you can start following the steps outlined below to complete your installation!
– Step 2 – Connect the Inlet Pipe to the Float Valves
In Step 2 of installing, you will need to connect the inlet pipe to the valves. First, ensure that the inlet pipe is cut to an appropriate length that fits securely and tightly into the float valve. Then, use a wrench to tighten it until it is firmly secured. After this, apply sealant around the pipe for added insulation and to prevent water leakage.
– Step 3 – Position the Float Valve in the Tank
Next up, you will need to position the valve into your tank. This is done by carefully attaching the valve stem to its fixed seat within the tank before tightening it with a screwdriver. Make sure that it is properly secured and that there are no gaps or holes in the connection.
– Step 4 – Connect the Outlet Pipe to the Float Valves
In this last step, you will need to connect the outlet pipe to your float valves. First make sure that the valve stem is properly connected to its fixed seat within the tank before using a wrench to tighten the pipe securely. Once this is done, check for any leaks in the connection and apply sealant if necessary. After that, you have successfully installed your float valve!
By following these steps carefully, you can easily install it in your water tank and save yourself time and money in the long run. They are a great way to maintain optimal levels of liquid in your tank and prevent flooding or other costly damages that can occur from overfilling. Plus, since they don’t require electricity to function, they can be used both indoors and outdoors – making them the perfect choice for a variety of different water tanks.

Troubleshooting Common Problems with Installation
Troubleshooting common problems with installation can be tricky and time consuming if you don’t have the right tools or knowledge. Firstly, it’s important to make sure that the stem is firmly attached to its fixed seat within the tank before tightening it up with a screwdriver. Additionally, make sure the inlet and outlet pipes are cut to an appropriate length that fits securely and tightly into the float valve – otherwise it will not be able to function properly. Lastly, always apply sealant around the pipe for added insulation and to prevent any water leakage during installation.
If you’re still having problems with your installation, it may be best to call a professional plumber for assistance. They will have the knowledge and experience to safely install your float valve and help you avoid any costly damages in the future. With these tips in mind, you can easily install it in your water tank and enjoy its many benefits!
Tips for Maintenance of A Floating Valve in Your Water Tank
To ensure that your float valve functions properly and remains in good condition, regular maintenance is key. Firstly, it’s important to check the connections of the valve periodically for any signs of wear or damage. Additionally, it’s also important to check for any debris that may have gotten stuck inside the valve. These can easily be removed with an old toothbrush or other soft bristled brush.
It’s also important to regularly check the seals around the inlet and outlet pipes for any signs of cracks or damage. If you notice any, consider replacing them immediately to avoid further problems. Additionally, it’s also recommended to regularly apply sealant around the pipes for added insulation and to prevent water leakage.
By following these tips, you can ensure that your valve remains in good condition and continues to function properly. Regular maintenance will also help you save time and money in the long run by avoiding costly repairs or damages caused by a malfunctioning. So make sure to keep up with the maintenance and enjoy its many benefits!
Overall, installing a float valve in your water tank is a relatively straightforward process. However, it’s important to follow these steps carefully to ensure that it’s properly secured and functioning. Additionally, regular maintenance is key for keeping them in optimal condition. By following these tips, you can easily install and maintain it in your water tank – saving yourself time and money in the long run.
For any additional help or questions, please contact ShunCheng Valve today! Our experts will be more than happy to assist you with all your needs and make sure that you have a successful installation experience.